How To Use 3 Pin Picture Hooks? Effective Ways And FAQs
The desire to create an elegant view in your room’s décor will always land you to do some research on which devices you can use to mount your items on the wall. If you’ve been having some trouble with how or what to use to hold your wall pictures, clocks, or other decors, it’s high time you learned about how to use 3 pin picture hooks.
A 3 Pin Hook will always help sort your way out on each item you need to mount on the wall. Ways to mount 3 Pin-picture hooks may be somehow challenging if you’ve never had an experience before.
Pictures are a quick way to add a personalized touch to a room’s décor. This article will give you some reviews to consider before purchasing 3 Pin Hook and steps to follow when mounting.
What Tools Do You Need to Install a 3-Pin Picture Hooks?
All you need to carry out this installation is:
- A picture frame/ mirror
- A small hammer
- A pack of 3-pin picture hooks
- A pencil
- A tape measure
- A spirit level (optional)
Let’s Get Down How to Use 3 Pin Picture Hooks
1st Step: Positioning
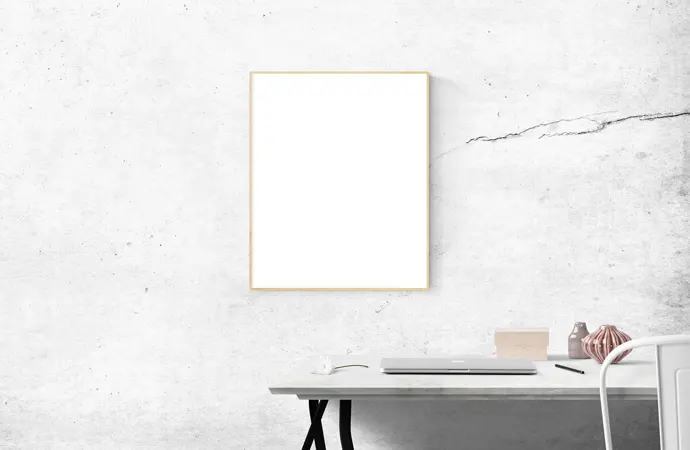
Measure and Mark the Hook Location. Where you choose to hang a picture is entirely up to you. Ideally, the middle of the picture frame should be at eye level.
Once you’ve figured out where you want to place it, hold the picture in an upright position against the wall.
Use A Pencil
Use a pencil to mark the line at the top and bottom of the frame. You may use a spirit level to ensure the picture’s positioning is correct.
Alternatively, have someone look at the frame from a distance while you hold it up.
What’s Next?
Next, use the tape measure to find the distance from the top of the frame to its hanging cord. Measure the exact length on the wall and mark the hook location.
2nd Step: Aligning the Pin Holes
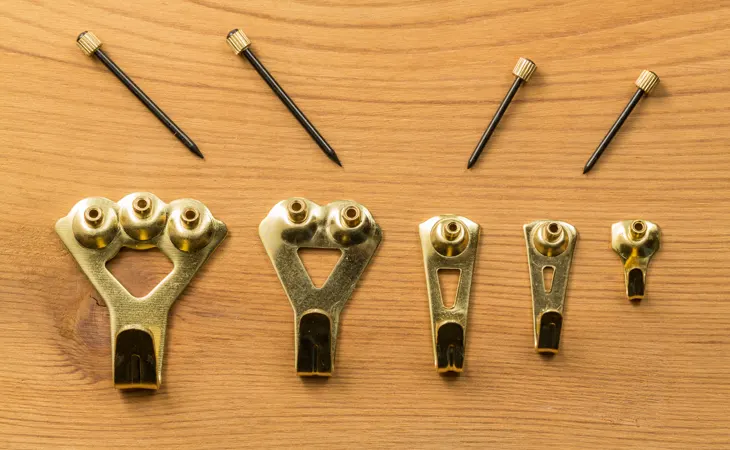
3-pin picture hooks come in different sizes. This means individual hook size will determine your pinholes.
To measure the exact location of the holes, hold the Hook-up flush against the marking you made for the hook level.
Make sure the Hook is upright, so your picture doesn’t end up slanted. The three pins should align with the Hook’s height.
3rd Step: Installing the 3-Pin Picture Hook
- Hold the Hook firmly against the wall, using your thumb and index finger to keep it in place.
- Use a small hammer to drive the first pin into the wall. The amount of force you require will depend on the surface you are working on.
- Repeat the process with the two remaining pins.
- Make sure that the pins are all the way in and the back of the Hook is lying flat against the wall.
- Be careful to hit the pins on the head as hitting the plastic hook may damage it. Also, watch out for your fingers!
- After the pins are securely intact with the wall, stop hammering as any further hammering will loosen the Hook.
Last Step: Mounting Your Picture
Holding your picture on both ends, place the cord directly onto the Hook. You might need to adjust the picture to level it up if there is a need.
Check the stability of the picture frame to minimize the risk of leaving the picture frame loose on the Hook.
What Should You Consider When You Mount A Picture Frame?
Hanging a picture frame is relatively easy. But there are a few facts to consider before getting it right for the first time. Below are a few tips you need to contemplate about before messing up your wall.

01. The wall surface type
Where you hang your pictures matters a lot, it is crucial to know if you are doing it on a wooden surface or a solid wall. This determines the type of device you will need to fix the picture frame
02. Weight
When hooking up any item, this is one of the critical factors that need some consideration. The weight of the picture frame determines the type of Hook to use.
A strong Hook is always promising as it assures you that however heavy the structure is, it will always be intact with no insecurities of falling.
03. Hooking posture
The primary purpose of the hooking room’s décor is to provide an elegant view. It’s achievable if the picture frames get hooked in a correct straight posture. Having a proper posture shows Professionalism and neatness in your room.
Talking about decent appearances one might need in a room, it’s essential to know why a 3 Pin picture hook is suitable for this work and the best installation methods.
Why You Should Mount Your Pictures with 3-Pin Picture Hooks?
Several reasons will always make you choose 3 Pin Hook rather than any other device.
A. Flexibility
A 3-pin picture hook is flexible, especially on surfaces such as concrete, brick, or wooden walls.
B. Easy to Use
They are relatively Easy to Use. The professionally made device comes with inbuilt nails that are easy to hammer on the wall.
There are no heavy mechanisms used in hammering these nails.
C. Easy to Remove
Removing these hooks will never leave your wall with oversized pinholes if one needs to relocate a frame.
At some point, the pinholes are even unnoticed upon removal of the Hooks.
D. Various sizes
They come in various sizes that can support pictures of different weights because of the reinforced 3-pin fastening.
E. Frame balance
Using a hook rather than an individual nail to hold the picture’s cord allows the frame to balance.
- How to Screw into Wall without Drill?
- Top 3 Best Picture Hangers Without Nails?
- How To Reuse Wall Anchors?
Top Questions About Picture Hooks
How to Make Sure 3-Pin Picture Hooks Work Effectively?
You need to realize that leaving your cute decor hanging safely on the walls is the best thing to do. By doing this, it’s essential to learn how effective one can use these hooks to give the desired stylish look and provide vital support to your decors.
For this to work efficiently, First, you need to ensure that the surface of the wall you are mounting the hooks needs to be smooth and flat. This ensures that the back of the Hook is entirely intact with the wall.
After hanging your picture, Make sure that its weight pulls down on the Hook parallel to the wall. This means you may have to adjust the cord, making it tighter.
An excessive outward pull on the Hook can cause it to detach from the wall.
How to Safely Remove 3-Pin Picture Hooks?
It’s always important to review some tips needed to remove these hooks. Some of these tips are;
→ If you accidentally attached the hooks crookedly, you will need a thin blade for this removal.
→ Gently wiggle the blade to pry the Hook off the wall. You may need to do it from a couple of angles to remove all three pins.
Why should you not use a hook in the same pinholes?
Please note that you cannot re-use the Hook as the pin strength gets compromised during removal. You should also avoid putting a new hook into the same pinholes, as this may compromise your decors’ ability to provide vital support.
Conclusion
After a broad review of the 3-pin picture hooks, it is now so evident that this is one of the most reliable devices to hang your picture frames, mirrors, or other décor items. When dealing with any home or office décor, having the best stylish looks is always the aim after undertaking the task. 3 Pin-picture hook is all that you need.
After the installation of these devices, you will always smile at your neat and well-organized picture frames attached firmly to the wall.
It’s now up to you to give your room a stylish look that will leave everyone gazing around the walls with 3 Pin Hooks. They are very much available to any market and very affordable.


